55
在本节中,我们将学习如何使用 apache Spark connetor通过 EMR Serverless 和 Redshift Serverless 运行大数据工作负载
我们将在 EMR Serverless 上读取Redshift Serverless中的数据,使用 Spark 运行ETL,将数据加载回 Redshift Serverless;以及从S3 读取数据,在 EMR Serverless 上使用 Spark 运行ETL,然后将转换后的数据写入 Redshift Serverless:

- 下载下面的压缩文件夹。下载完成后,解压缩文件夹并将所有内容上传到由 CloudFormation 模板创建的
subfolders (script and input)Amazon S3 资源存储桶 ( )。S3Bucket

- 解压后的文件夹如下所示。

- 使用 Cloudformation 堆栈的输出选项卡中的 S3 存储桶上传上述解压缩的文件夹。
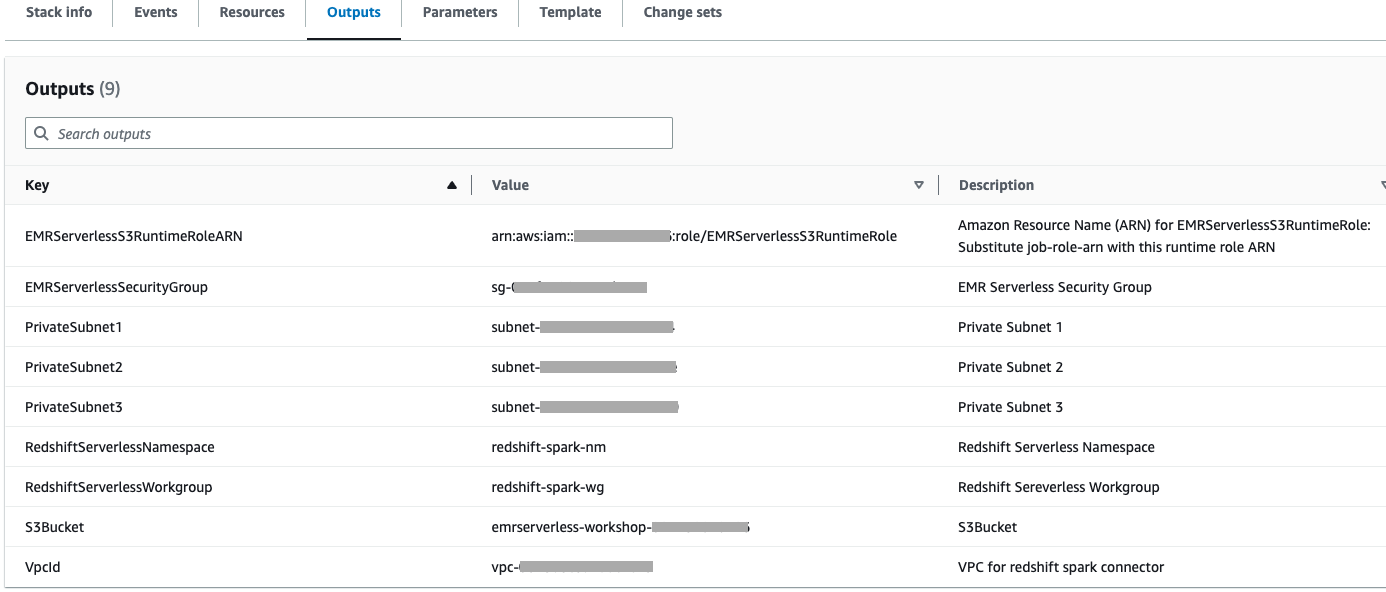
- 使用 Cloudformation 堆栈的输出选项卡中的 S3 存储桶创建一个名为的前缀(文件夹),
redshift-spark-demo-temp-dir该前缀将作为 redshift 加载的临时目录。
- 上传所需的子文件夹并创建新文件夹后,存储桶将如下所示。

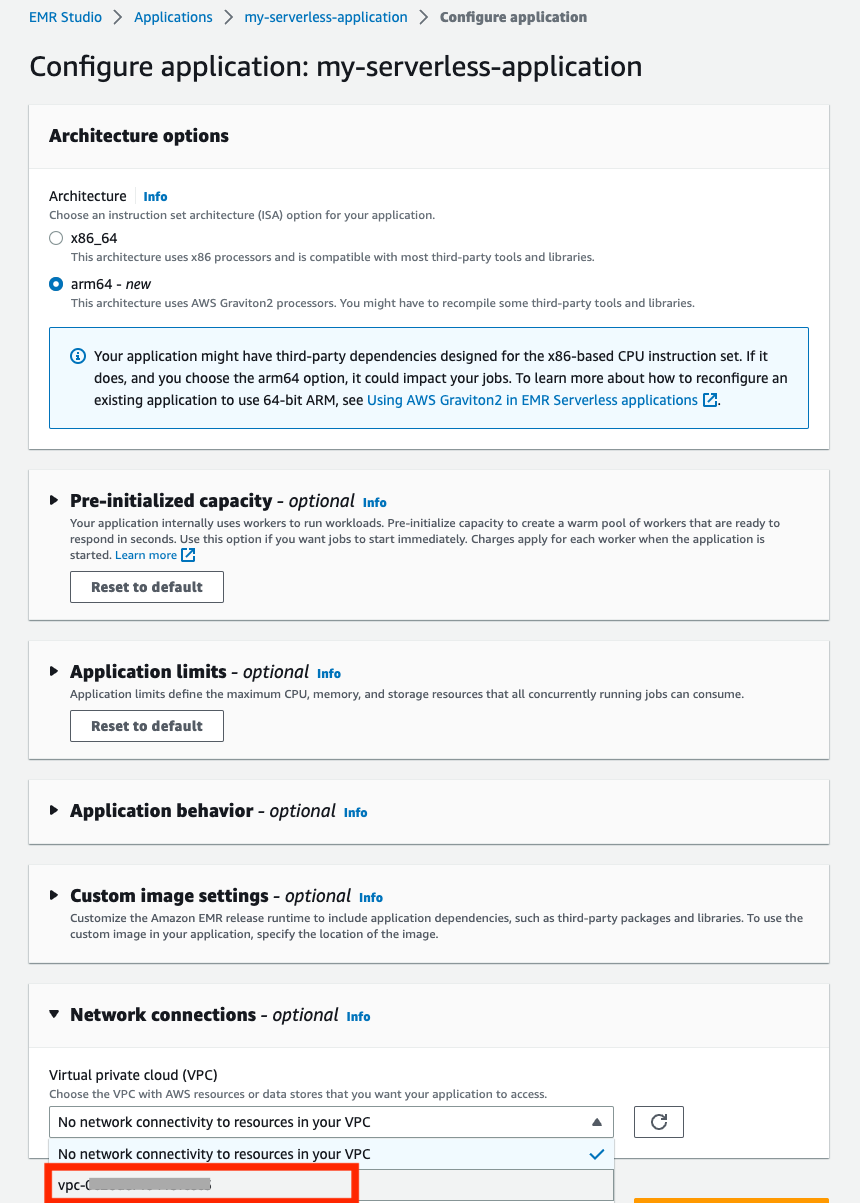
Action从 EMR studio 中选择您的 EMR 无服务器应用程序,然后单击Configure
确保您的 EMR 无服务器应用程序使用 emr-6.10.0 或更高版本作为发布版本并且处于 STOPPED 状态。如果您的 EMR 无服务器应用程序与 emr-6.10.0 或更高版本不同,请创建一个新应用程序

- 在配置应用程序部分中,向下
Network connections选择在 cloudformation 输出屏幕中找到的 VPC 和私有子网以及安全组部分的 EmrServerless-sg。

在 Redshift Serverless 中激活示例数据库
- 从 AWS 控制台导航到 Amazon Redshift 服务页面。
- 单击 Redshift 无服务器。

- 单击 redshift serverless 的命名空间
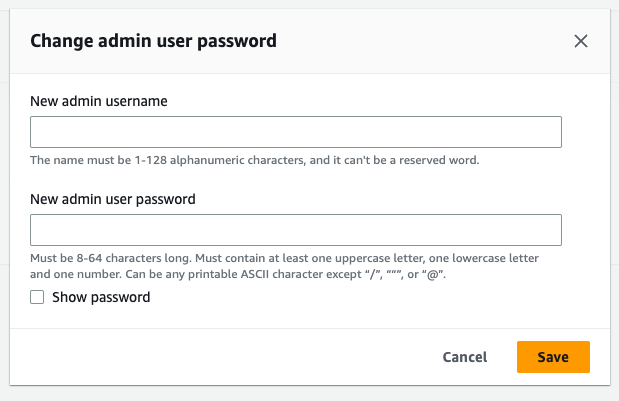
- 点击更改管理员密码

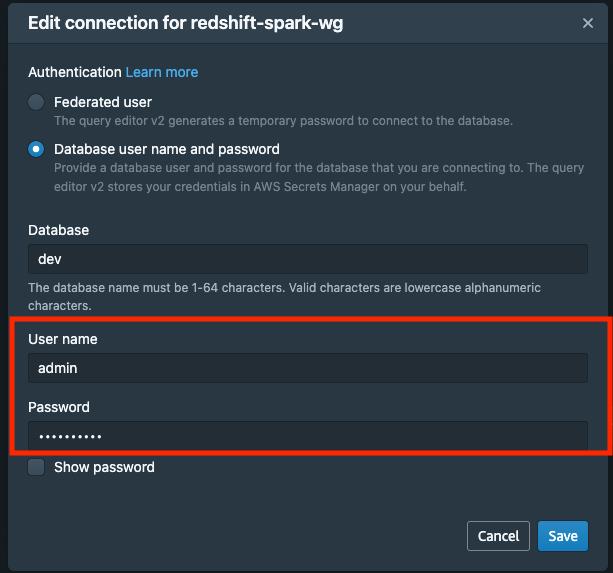
- 输入管理员的用户名、管理员和新密码。
- 完成管理员密码更改后,返回 redshift serverless 主页,然后单击“查询数据”进入 redshift 查询编辑器。

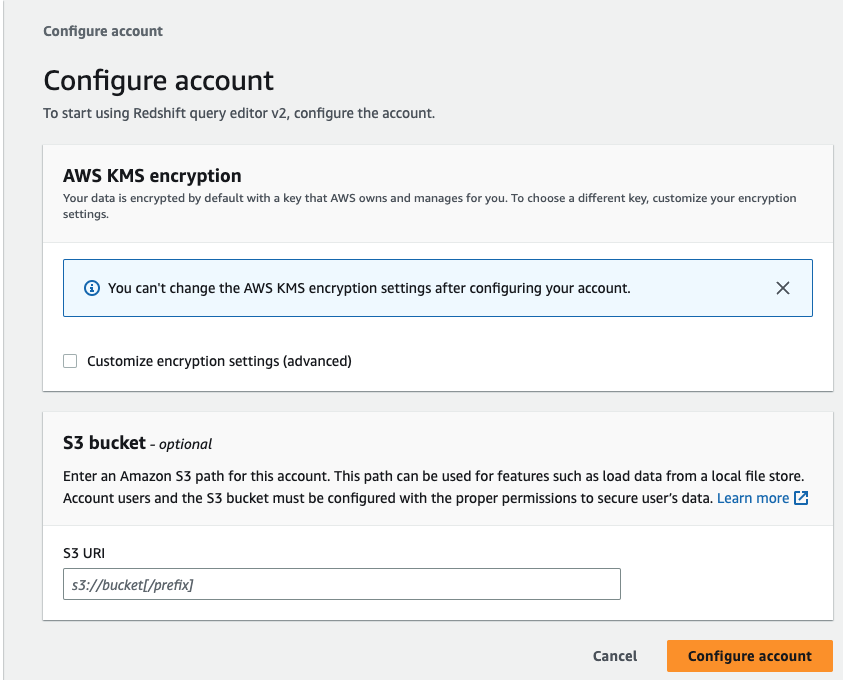
- 由于这是您第一次尝试使用查询编辑器 v2,因此您必须配置帐户。默认情况下,您的数据使用 AWS 拥有和管理的密钥进行加密。如果您选择使用自己的密钥,则可以选择通过单击自定义加密设置(高级)来执行此操作。但现在让我们继续使用默认设置并单击配置帐户。
- 打开查询编辑器 v2 后,单击 redshift 无服务器工作组以创建连接 (
using the admin username),然后单击create connection按钮。

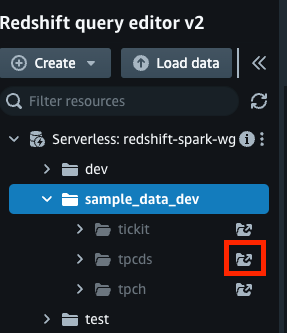
- 在工作组下有一个名为 的示例数据库
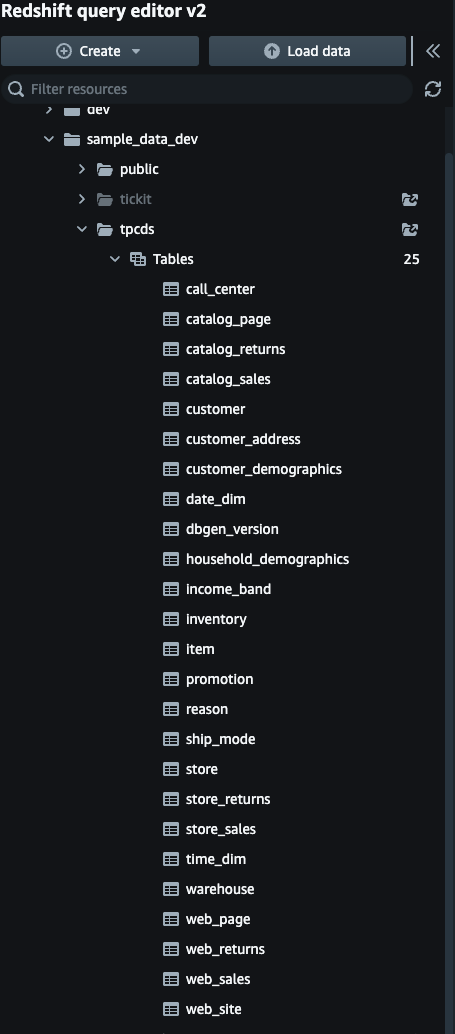
sample_data_dev。三个示例架构对应于您可以加载到 Amazon Redshift Serverless 数据库中的三个示例数据集。现在让我们加载tpcds模式数据。单击**Open sample notebooktpcds 架构。
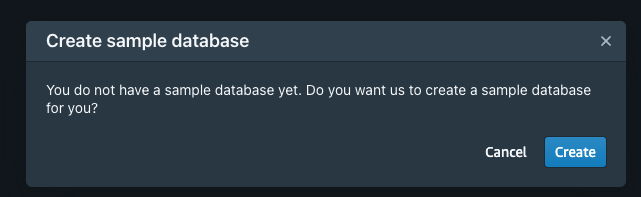
- 单击创建示例数据库。
- 查看数据库中的表列表
sample_data_dev、tpcdsschema
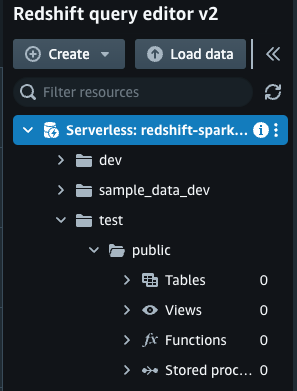
- 在提交 Spark 作业之前。
test让我们验证数据库、模式中是否没有表public。
- 下面显示了将提交到 EMR 无服务器应用程序的 pyspark 代码
- 如果源是
redshift,那么它将从 Redshift Serverless Sample_data_dev 数据库获取数据,进行转换并写回 Redshift 测试数据库。如果源是 S3,那么它将获取数据进行S3转换并写入 redshift serverless 来测试数据库。。
from pyspark.sql import SparkSession
from pyspark.sql import Column
from pyspark.sql.functions import upper, col, concat, lit, current_timestamp, current_date, count
from datetime import datetime
import sys

source = sys.argv[1]
accountId = sys.argv[2]

def create_redshift_context(database):
    url_redshift = f"jdbc:redshift:iam://redshift-spark-wg.{accountId}.us-east-1.redshift-serverless.amazonaws.com:5439/{database}"
    aws_role = f"arn:aws:iam::{accountId}:role/AmazonRedshiftCommandsAccessRole"
    temp_dir= f"s3://emrserverless-workshop-{accountId}/redshift-spark-demo-temp-dir/"

    redshiftOptions = {
        "url": url_redshift,
        "tempdir": temp_dir,
        "aws_iam_role": aws_role
    }

    return redshiftOptions

def read_from_s3(spark):

    startTime = datetime.now()
    print("Process started at: ", startTime)

    as_of_date = startTime.strftime("%Y-%m-%d")

    rawDF = spark.read.parquet(f"s3://emrserverless-workshop-{accountId}/input/")
    rawDF.printSchema()

    print("Total number of records: " + str(rawDF.count()))

    return rawDF

def read_from_redshift(spark, redshiftOptions):
    customerDF = (
        spark.read
            .format("io.github.spark_redshift_community.spark.redshift")
            .options(**redshiftOptions)
            .option("dbtable","tpcds.customer")
            .load()
    )

    storeSalesDF = (
        spark.read
            .format("io.github.spark_redshift_community.spark.redshift")
            .options(**redshiftOptions)
            .option("dbtable","tpcds.store_sales")
            .load()
    )

    webSalesDF = (
        spark.read
            .format("io.github.spark_redshift_community.spark.redshift")
            .options(**redshiftOptions)
            .option("dbtable","tpcds.web_Sales")
            .load()
    )

    catalogSalesDF = (
        spark.read
            .format("io.github.spark_redshift_community.spark.redshift")
            .options(**redshiftOptions)
            .option("dbtable","tpcds.catalog_sales")
            .load()
            )

    aggregateDF = customerDF \
            .join(storeSalesDF, customerDF.c_customer_sk == storeSalesDF.ss_customer_sk, "left") \
            .join(webSalesDF, customerDF.c_customer_sk == webSalesDF.ws_bill_customer_sk,"left") \
            .join(catalogSalesDF, customerDF.c_customer_sk == catalogSalesDF.cs_bill_customer_sk, "left") \
            .groupBy("c_customer_id") \
            .agg(count("ss_customer_sk"),count("cs_bill_customer_sk"),count("ws_bill_customer_sk")) \
            .select(col("c_customer_id"),\
            col("count(ss_customer_sk)"), \
            col("count(cs_bill_customer_sk)"), \
            col("count(ws_bill_customer_sk)")) \
            .withColumnRenamed("count(ss_customer_sk)", "total_store_sales") \
            .withColumnRenamed("count(cs_bill_customer_sk)", "total_catalog_sales") \
            .withColumnRenamed("count(ws_bill_customer_sk)", "total_web_sales")
    return aggregateDF

def write_to_redshift (spark, dataframe, redshiftOptions, tableName, schemaName):

    dataframe.write.format("io.github.spark_redshift_community.spark.redshift")\
    .options(**redshiftOptions)\
    .option("dbtable", f"{schemaName}.{tableName}")\
    .option("tempformat", "CSV")\
    .mode("append")\
    .save()

if __name__ == "__main__":
	spark = SparkSession.builder.appName("Redshift Spark Connector").config('spark.sql.debug.maxToStringFields',2000).getOrCreate()
	redshiftOptionsWrite = create_redshift_context("test")
	redshiftOptionsRead = create_redshift_context("sample_data_dev")
	sourceDF = read_from_s3(spark) if source.upper() == "S3" else read_from_redshift(spark, redshiftOptionsRead)
	write_to_redshift(spark, sourceDF, redshiftOptionsWrite, "nyc_taxi_trips","public") if source.upper() == "S3" else write_to_redshift(spark, sourceDF, redshiftOptionsWrite, "total_by_customer","public")
	spark.stop()
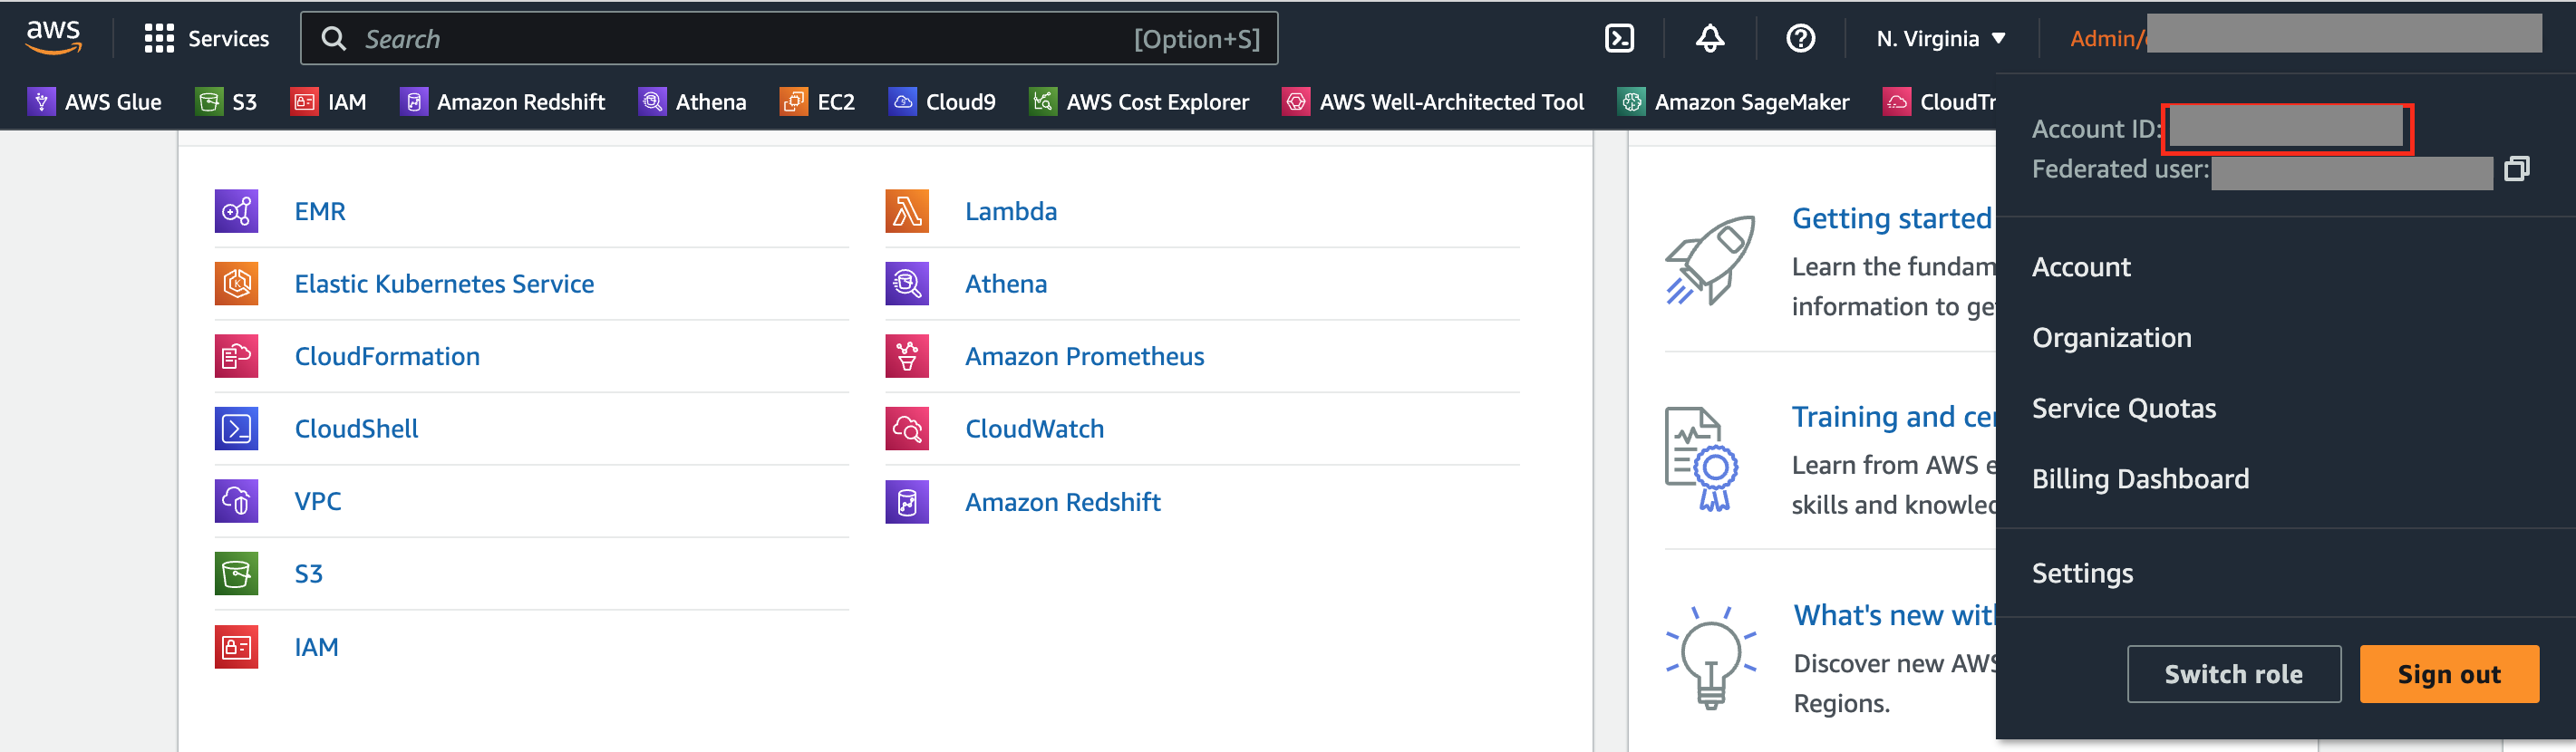
- 从 AWS 控制台主页检索您的 AWS 帐号
- 从 CloudFormation 模板输出选项卡中检索 EMR 无服务器 Job_Role_ARN 和 S3_BUCKET。并从 EMR Studio 控制台获取 ApplicationID。

- 我们现在将在 Cloud9 终端中导出输出值:
1
2
3
4
export JOB_ROLE_ARN=<<EmrServerlessS3RuntimeRoleARN>>
export S3_BUCKET=s3://<<S3Bucket>>
export APPLICATION_ID=<<application_id>>
export ACCOUNT_ID=<<accountId>>
- 运行以下代码以使用 CLI 将 Spark 作业提交到应用程序。替换
{ApplicationID}为从 EMR Studio 获取的 EMR 无服务器应用程序,替换{JobExecutionArn}为 CloudFormation 模板输出中的 EmrServerlessJobRoleArn。
aws emr-serverless start-job-run --application-id ${APPLICATION_ID} --region us-east-1 --execution-role-arn ${JOB_ROLE_ARN} --name "Redshift-Redshift-Job" --job-driver '{
        "sparkSubmit": {
            "entryPoint": "'"$S3_BUCKET"'/script/load_to_redshift.py",
            "entryPointArguments": ["redshift","'"$ACCOUNT_ID"'"]
        }
    }' --configuration-overrides '{
    "monitoringConfiguration": {
        "s3MonitoringConfiguration": {
            "logUri": "'"${S3_BUCKET}"'/logs/"
        }
    }
}'

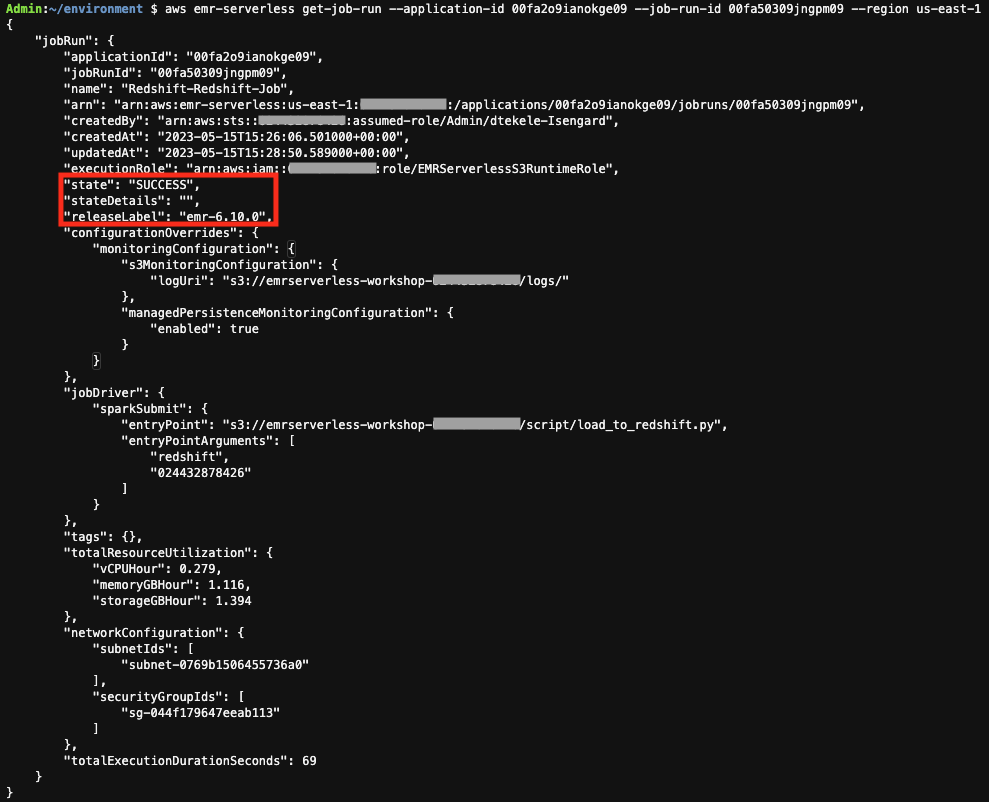
- 通过获取上一步中的applicationId和jobRunId来检查提交的作业的状态
1
aws emr-serverless get-job-run --application-id ${APPLICATION_ID} --job-run-id jobRunId --region us-east-1
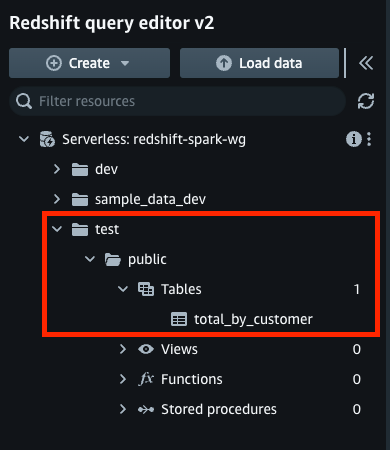
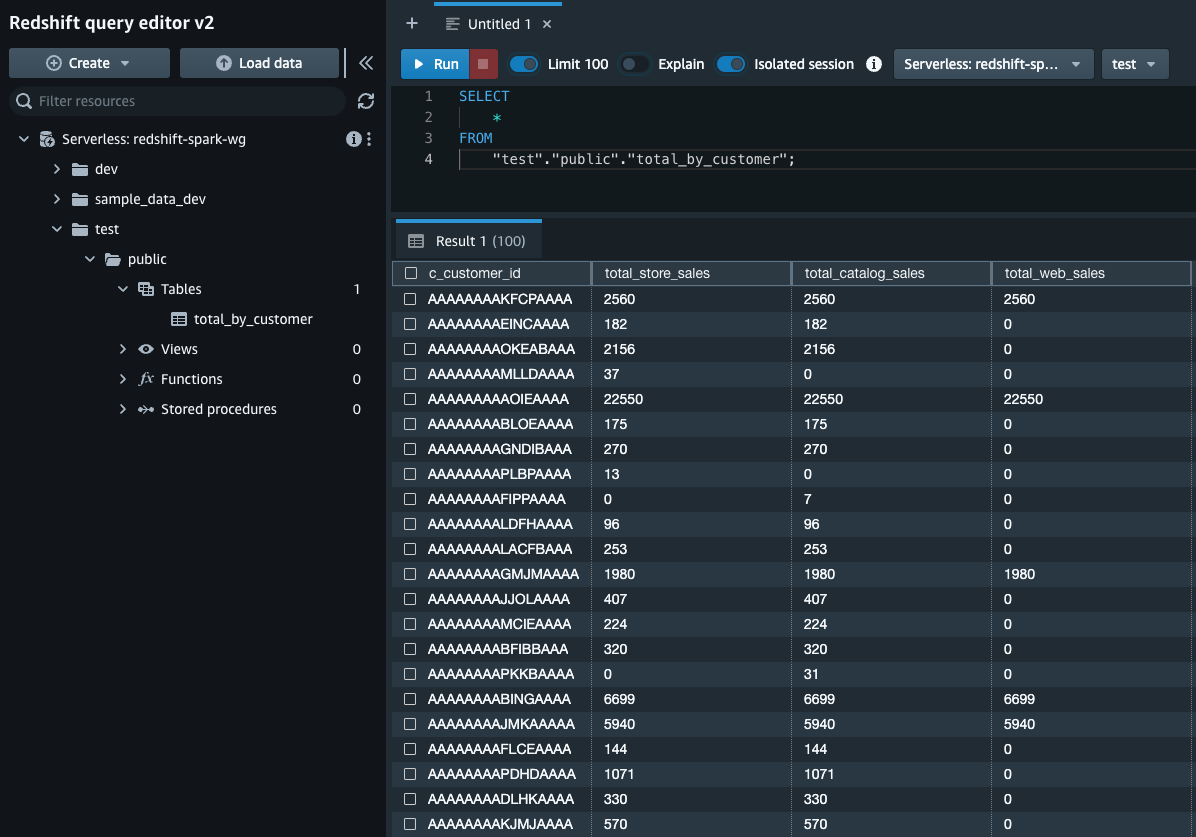
- 从 redshift serverless 导航到查询编辑器,并验证是否在数据库、架构
total_by_customer中创建了表。test``public

- 对创建的 redshift 表运行选择查询

- 打开您创建的 EMR 无服务器应用程序。
- EMR 无服务器应用程序,选择提交作业。

在提交作业屏幕上的运行时角色下,您可以让 EMR Serverless 为作业创建角色,但我们将使用 Cloudformation 模板已创建的角色
对于本次研讨会,我们有一个由 Cloudformation 模板创建的角色,我们可以使用它。
在提交作业屏幕中输入以下详细信息:
| 姓名 | S3-Redshift-作业 |
| 运行时角色 | EMRServerlessS3Runtime角色 |
| 脚本位置 S3 URI | AccountIds3 ://emrserverless-workshop-/script/load_to_redshift.py |
| 脚本参数 | [“S3”,“ AccountId”] |
点击提交作业

作业提交后,运行状态将显示成功。
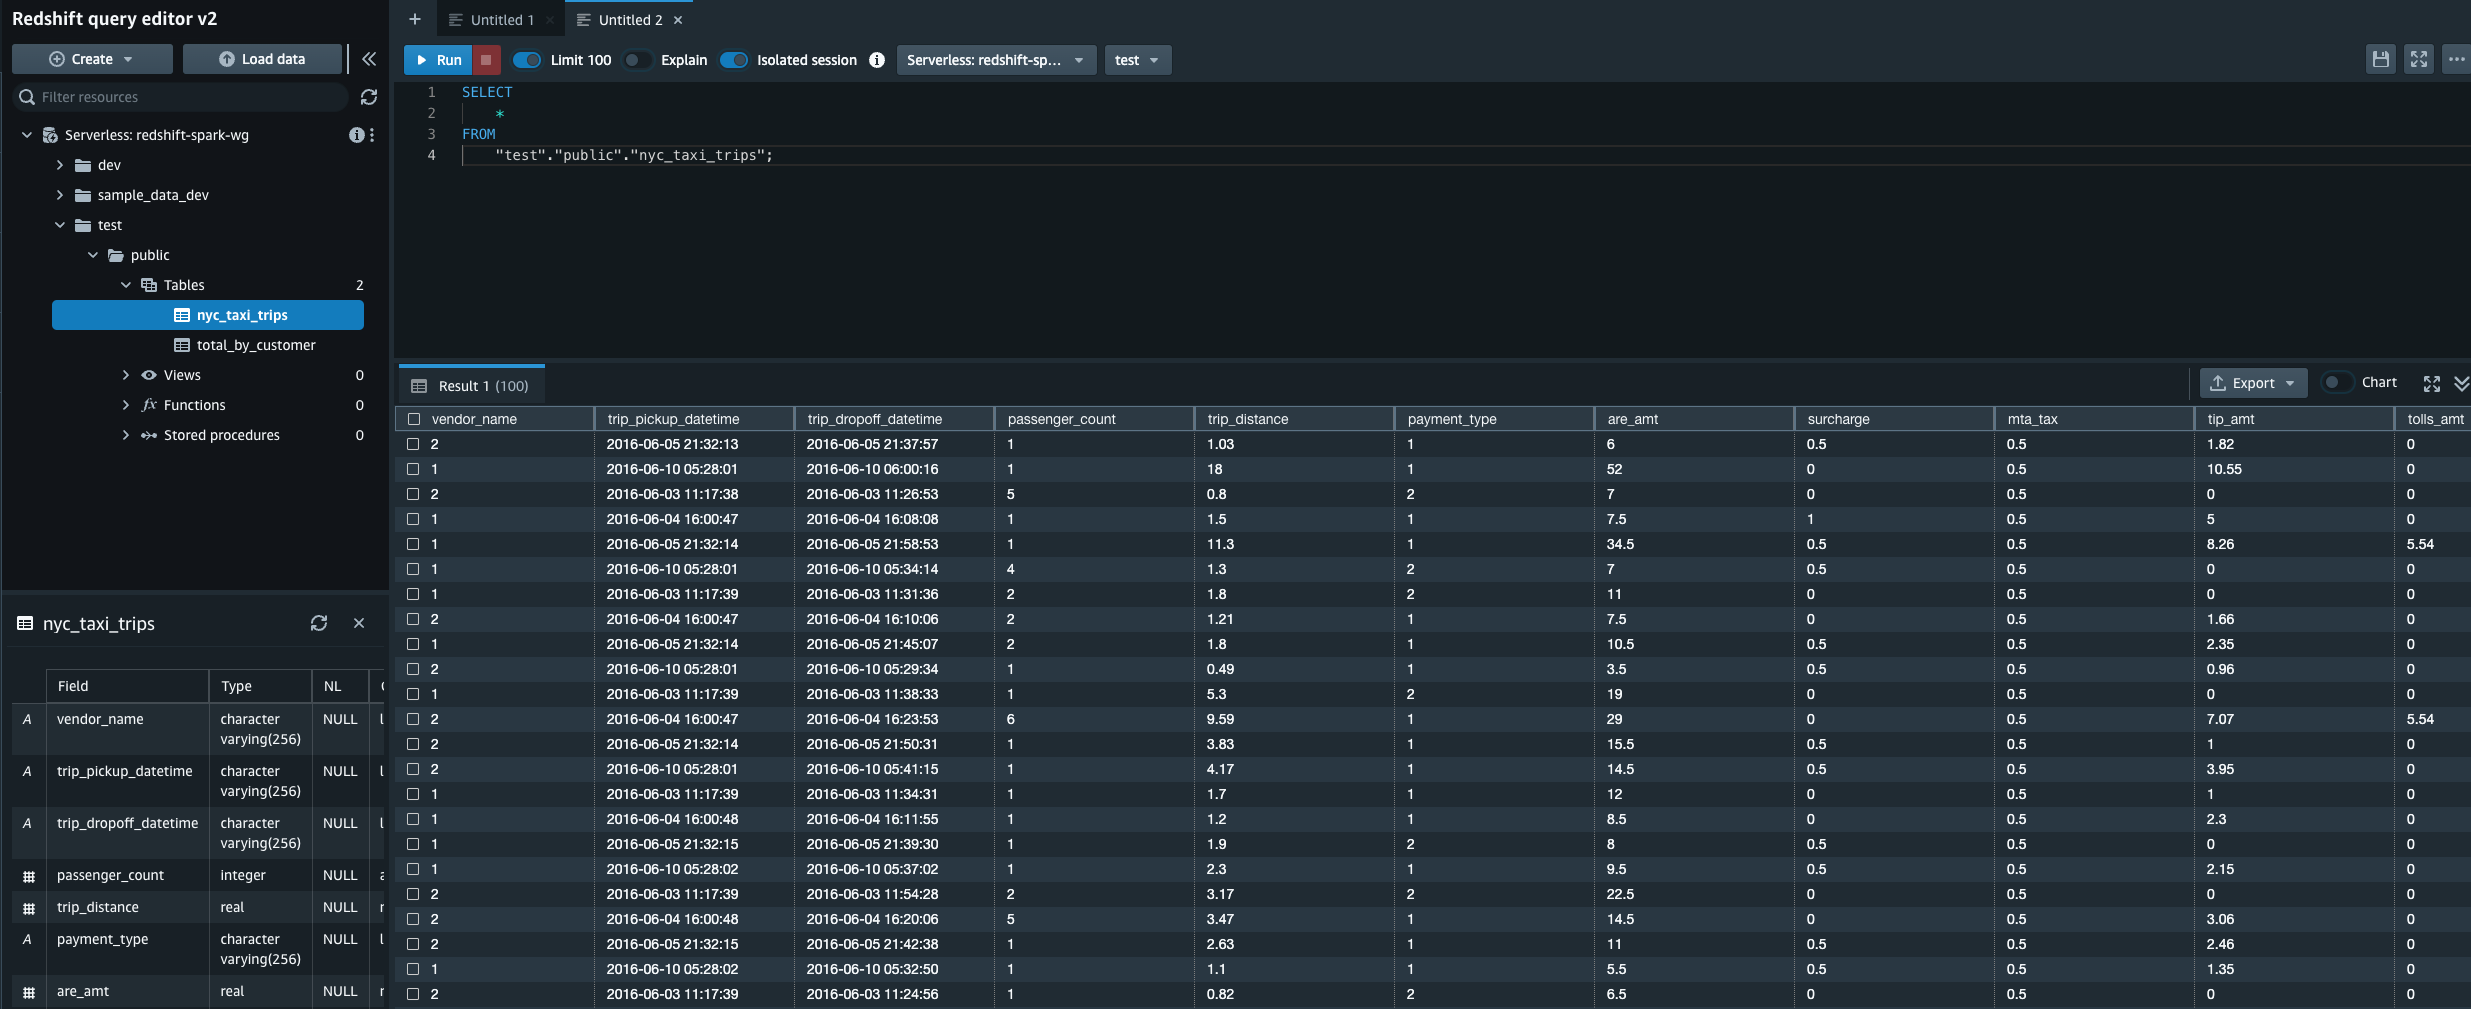
- 从 redshift serverless 导航到查询编辑器,并验证是否在数据库、架构
nyc_taxi_trips中创建了表。test``public
nyc_taxi_trips对redshift 表运行选择查询
